How to automate invoice processing in 8 practical steps
Accounts payable (AP) is getting tougher.
In a 2023 survey of accounts payable departments, Stampli reported that 80% of AP leaders said they expect an increase in the number of invoices their teams must handle. Just over half (53%) also said they expect invoices to become more complex.
For AP teams, this means pressure to do more with less. AP automation is the clear solution, but for many AP leaders, it brings up fears of complexity and risk. This article tackles those concerns head-on. We’ll show you the core principles and key steps, giving you a clear picture of how to approach AP automation without getting bogged down in the details.
The benefits of automating invoice processing
Invoice processing replaces manual tasks and streamlines AP workflows. By increasing labor productivity and processing efficiency, it delivers several benefits to your organization.
Faster invoice processing
Automation reduces the time it takes to process invoices, reducing delayed payments and freeing AP staff for higher-value tasks.
Reduced errors and fraud
Automation platforms minimize the risk of errors and fraud to reduce discrepancies and prevent financial losses.
Enhanced visibility and control
Real-time reporting and dashboards allow for better spend and performance tracking and provide a complete audit trail.
Significant cost savings
By improving labor productivity and minimizing errors and delays, automation reduces per-invoice costs and late payment fees.
Automated vs manual invoice processing
| Task | Manual processing | Automated processing |
| Invoice capture and data entry | Manually entering invoice details into accounting software. | Automatic data capture and data entry with optical character recognition (OCR) and AI. |
| Invoice general ledger (GL) coding | Looking up GL codes and manually assigning them to line items. | Software automatically looks up and assigns GL codes to line items. |
| Invoice verification | Manually matching purchase order (PO), invoice, and shipping details, and investigating discrepancies. | Automatically matches details and flags discrepancies for investigation. |
| Approval routing | Manually determining appropriate approver and delivering invoice for sign-off. | Software automatically determines the appropriate approver and forwards the invoice for sign-off. |
| Payment processing | Manually paying suppliers via check, electronic funds transfer (EFT), or credit card and recording payment. | Automatically pays suppliers with their preferred payment method and records payment. |
| Scalability | Scaling requires adding and training extra staff, which can create additional bottlenecks. | Software easily scales without the need for additional headcount or significant process changes. |
| Fraud prevention | Paper processes offer minimal oversight of employee actions and payment processing. | Automatically detects and flags discrepancies and enforces internal controls and user roles. |
With these benefits in mind, let’s look at how you can get started with automation.
Preparing for invoice automation
A successful implementation depends on careful preparation. In this section, we’ll show you how to assess your current processes, set automation goals, and choose the solution that best fits your needs.
Step 1: Evaluate your current invoice processes
Begin with a detailed breakdown of your existing AP processes. Identify areas for improvement by asking questions like:
- What’s slowing down your AP team? Where do employees spend most of their time? How long are they on hold waiting for other departments to respond?
- Where are the bottlenecks? Some of the usual suspects include slow invoice data entry, time spent investigating invoice and PO mismatches, and busy approvers forgetting to sign off on invoices.
- What do the delays cost your organization? Look at factors like labor costs, late payment fees, payment errors, and impacts on KPIs.
Document your findings. This will help you create a roadmap for your automation strategy and ensure you stay focused on the areas where automation will have the biggest impact.
Step 2: Assess your current IT environment
After evaluating your AP workflows, assess your current IT environment to determine its readiness for invoice automation. Focus on these key areas:
- What existing systems are currently in place for finance and accounts payable processes? How well does data flow between them?
- How scalable and flexible is your current software to adapt to future growth and changing automation needs?
- What are your current data security and compliance requirements, and how well does your existing software meet these requirements?
This assessment will reveal any potential IT gaps that you need to address before implementing an automation solution.
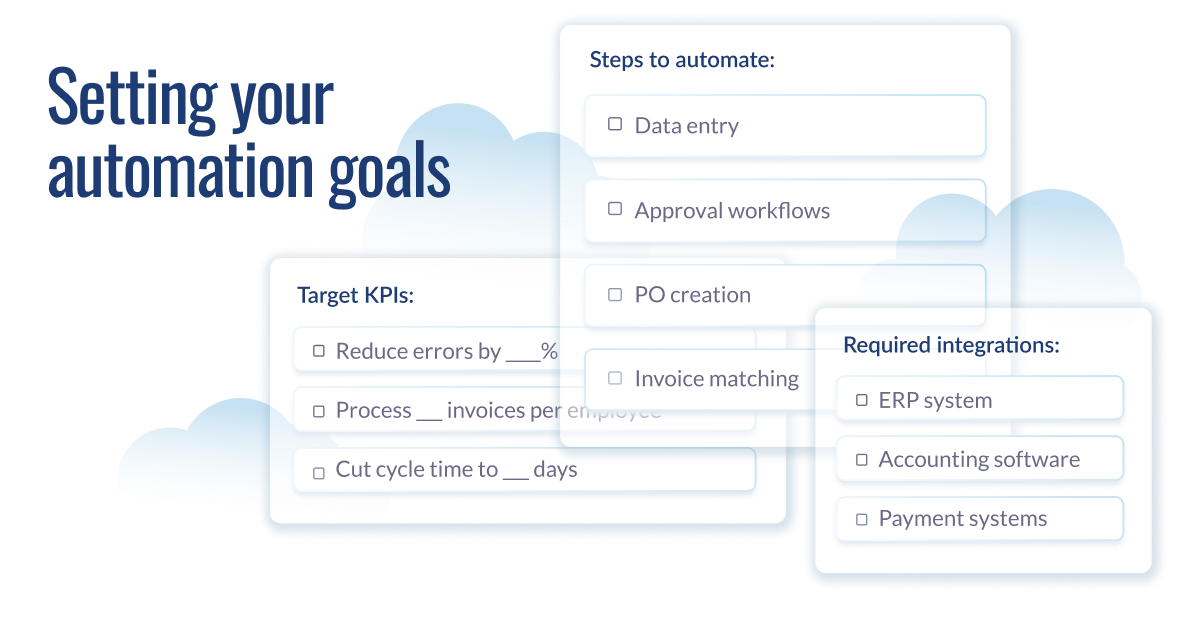
Step 3: Define your automation goals
Now that you know your current situation, focus on where you’d like to see improvements:
- What specific steps do you want to automate, and why? For example, do you want to automate data entry to reduce errors and improve staff productivity or automate approval workflows to improve processing times?
- Set target KPIs to measure your progress. For example, maybe you want to reduce invoice data entry errors by 70%, improve invoices processed per employee by 60%, or reduce invoice processing cycle time to three days.
- What level of integration with your ERP, accounting, or payment systems is necessary to achieve automation goals?
Prioritize your goals based on their impact and feasibility, then begin searching for automation solutions that meet your needs.
Step 4: Select invoice automation software
With a clear understanding of your current AP processes, IT environment, and automation goals, you’re ready to choose the right automation platform. Consider these factors when evaluating each solution:
- Do the platform’s capabilities align with your automation goals and target KPIs? For example, if your primary goal is to reduce invoice processing time, does the platform offer fast data extraction and coding? Does it offer KPI tracking to monitor performance?
- Will the platform seamlessly integrate with your ERP or accounting systems? Does it provide APIs for real-time synchronization?
- What level of training and support does the vendor provide pre and post-implementation? What’s their track record for successful implementations?
Once you choose the best-fit platform, the next step is to implement the solution and begin automating your invoice processing.
How to implement invoice processing automation
Implementing invoice processing software involves eight core steps:
- Install AP automation software
- Set up ERP and accounting integrations
- Centralize invoice capture and use e-invoices
- Set up data entry and GL coding workflows
- Set up PO matching and establish thresholds
- Establish approval hierarchy and routing workflows
- Set up payment processing
- Measure and improve
The process begins when you install your AP software solution.
Step 1: Install AP automation software
Begin by installing and configuring the AP automation software. Most AP software solutions (like Stampli) are cloud-based, so initial setup is simply a matter of logging into and configuring the platform. Here are some typical configuration tasks.
Set up user accounts and permissions
Create accounts for all users who need to access the system. Define their roles and set permissions to ensure data security. For example, you might create an AP clerk role with permissions limited to data entry, coding, and invoice matching.
For approvers, you’d limit their access to viewing and approving only those invoices within their authority. Other potential roles include supervisors, managers, and administrators, with varying permissions for reporting, system configuration, or user management.
Import AP data
Import relevant data from your existing systems and processes, such as vendor lists, charts of accounts, and purchase orders into the AP automation platform.
After configuring the software, you integrate it with your existing business systems.
Step 2: Set up ERP and accounting integrations
Connect the AP automation platform to your existing ERP, accounting software, and other relevant business systems. Usually, the AP automation vendor will assist you with the integration.
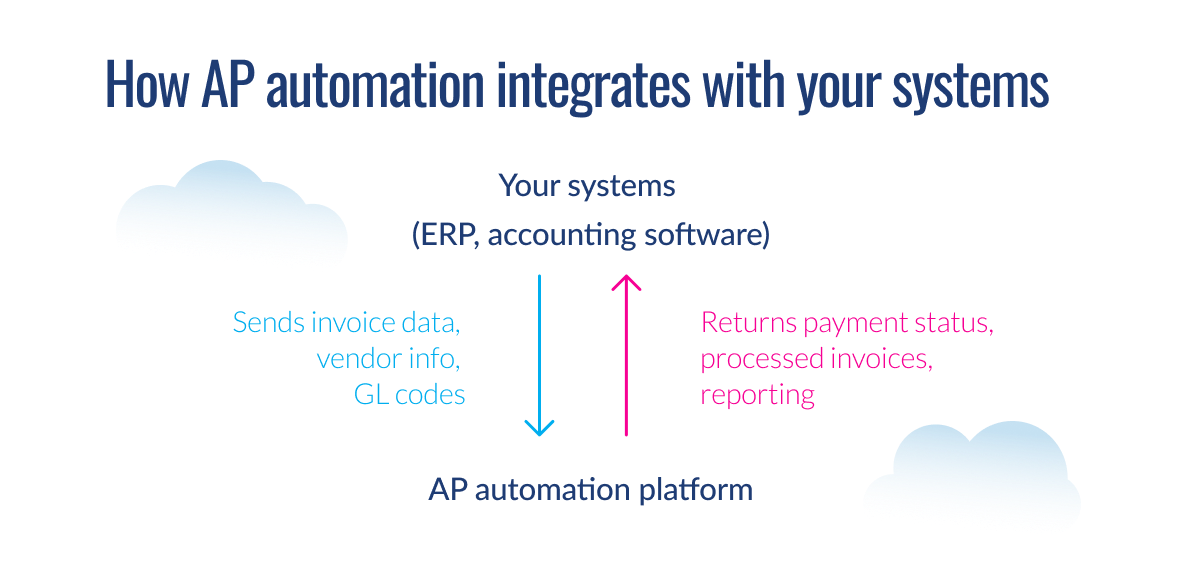
Identify integration points
Determine how data will flow between your AP automation platform and ERP/business systems. For example, will invoice data be automatically transferred from the AP automation platform to your ERP system for payment processing? Will the ERP sync payment status updates back to the AP automation platform?
Configure the integration
Set up file integration or API connections, data mapping, and auto-sync schedules. For instance, this could include mapping data fields between systems and ensuring that information like vendor names, invoice numbers, GL codes, and other information is aligned.
Test the integration
Test the integration to ensure data is transferred accurately and seamlessly between the AP automation platform and your business systems. You can do this by creating test invoices in the AP automation platform and tracking their flow through the various systems. This will ensure data is accurately captured and automated workflows are triggered successfully.
Once the AP automation platform is up and running, you can begin setting up your automated invoice processes.
Step 3: Centralize invoice capture and use e-invoices
Begin by centralizing invoice capture to make sure the AP automation platform captures all incoming invoices.
Establish central invoice addresses
Streamline invoice capture by setting up a dedicated email address (e.g., [email protected]) and physical address for receiving invoices. If your AP automation solution includes a vendor portal, encourage vendors to use that as the primary submission method for faster processing.
Switch to digital invoices
Ask vendors to submit invoices electronically in PDF, TIFF, XML, EDI, or other digital formats. For paper invoices, use the OCR function in your AP automation platform to digitize them.
Inform vendors
Email your suppliers and inform them about your new electronic invoice submission process. Share the invoice addresses and digital format guidelines, and invite them to register with your vendor portal.
After setting up your invoice capture process, you can move on to setting up your workflows.
Step 4: Set up data entry and coding workflows
Your AP automation platform may be pre-configured to automatically extract invoice data from digital invoices and assign GL codes. You can improve processing accuracy and efficiency by customizing these workflows.
Use invoice templates and validation rules
Create templates for common invoice types and set up validation rules to ensure data accuracy. For example, you can create a template for specific vendors that automatically maps the vendors’ invoice fields to the corresponding fields in the AP platform.
Define GL coding rules and templates
Define rules and templates to automatically assign GL codes based on the invoice data. For example, create a rule that assigns the GL code “4010 – Office Supplies” to any invoice line item that contains keywords like “pen,” “pencil,” or “stapler.”

Set up manual exception management workflows
Add a step to your coding workflow to route coding exceptions (where the system couldn’t code an invoice) to an AP employee for review. For example, if the system encounters an invoice from a new vendor or with an unusual line item, it can automatically route that invoice to a clerk for manual coding.
Boost capture and coding efficiency with AI
AI-powered AP automation platforms like Stampli can significantly streamline the data entry and coding process by using machine learning. They can interpret and understand different invoice types and coding patterns to extract and code invoice data with minimal intervention. Because they learn as they go, their accuracy continuously improves over time. This reduces the need for extensive manual configuration and exception management.
Next, set up PO matching and exception management workflows.
Step 5: Set up PO matching and establish thresholds
Many AP automation platforms offer two-way and three-way PO matching functionality. If your chosen platform doesn’t offer PO matching, you may need to rely on your ERP or manual processes to verify invoices.
To begin matching invoice, PO, and shipping receipt details, follow these steps.
Integrate with your ERP
Decide if you’ll use the AP platform or your ERP to match POs and invoices. This will depend on the type of integration you use and how the systems sync PO data. For example, API integrations automatically sync PO data in real-time, so you can use either your AP platform or ERP to match invoices. File-based integrations don’t sync PO data in real-time, so you may need to rely on your ERP’s PO matching functions to verify invoices.
Define matching criteria
Set up the rules for how the system should perform a three-way match, verifying that invoices to purchase orders and receipts match based on key details. For example, the PO numbers, vendor names, item descriptions, prices, and quantities for all three documents should match within accepted tolerances.
Set tolerance thresholds
Establish thresholds to allow for minor discrepancies in price or quantity to avoid unnecessary manual reviews and speed up the matching process. These thresholds help you handle common variations that occur during the procurement process.
Consider these examples:
- Set a rule to automatically approve invoices with a price discrepancy of no more than 3% or $50 (whichever is lower) per line item.
- Allow a quantity tolerance of +/- three units or 1% (whichever is greater) for non-critical items.
- Automatically approve invoices under $10,000 with a 5% total amount discrepancy.
How AI can optimize three-way matching
Rules-based three-way matching automation can improve invoice verification accuracy and efficiency, but these solutions have limitations. They can only compare exact invoice details — such as item descriptions — and they can’t interpret non-standard invoices or unstructured data like handwritten notes. As a result, they can return a number of discrepancies for invoices where prices and quantities match but item descriptions differ.
Intelligent PO matching solutions, like Stampli Cognitive AI™ PO Matching, can interpret and understand unstructured invoice details. They use machine learning and natural language processing to infer a match between different item descriptions that refer to the same product or service.
AI vs rules-based PO matching
| PO description | Invoice description | Rules-based matching | Cognitive AI matching |
| 30 cartons of pencils @ $10 | 30 cartons of pencils @ $10 | Match | Match |
| 30 cartons of pencils @ $10 | 40 cartons of pencils @ $10 | Mismatch | Mismatch |
| 30 cases of pencils @ $10 | Pencils, 30 cartons, $10 each | Mismatch | Match |
After setting up your PO matching workflows, finish the process by establishing approval hierarchies and routing workflows.
Step 6: Establish invoice approval hierarchy and routing workflows
Approval hierarchies and routing workflows are necessary for maintaining visibility and control over spending. Most AP automation platforms let you set up approval authority levels and routing workflows to route invoices to the appropriate approvers. Here’s how you set them up.
Create approval workflows
Set up workflows to route verified invoices to the appropriate approver(s) based on invoice type, amount, vendor, or other criteria. For example, you may require supervisor and CFO approval on all invoices over $100,000.
To configure this, set up the workflow to route the verified invoice to the supervisor first and then on to the CFO after it’s approved by the supervisor. You can also set up parallel approvals where a verified invoice is sent to multiple approvers simultaneously.
Set approval authority levels
Configure system user roles and permissions to control who can review and approve invoices. Ensure that the routing hierarchy forwards invoices to only those users authorized to approve them within the workflow. Using the above example, after setting up your CFO as a user, ensure the system only routes invoices over $100,000 to them for approval.
Set up automated reminders
Configure the settings to send automated reminders to approvers to keep the process moving efficiently. For example, set the system to send a reminder one week after it forwards an invoice to an approver. If they haven’t approved the invoice after six days, have the system send a second reminder. For urgent invoices, set reminders to be sent daily.
Use dynamic approval routing for greater flexibility
Automated approval routing significantly improves invoice processing efficiency and oversight. However, many automation platforms only offer fixed approval routing functionality. These systems must be reconfigured every time there’s a change in your approval routing workflows, such as an approver going on vacation.
AP platforms with dynamic approval routing automatically learn your business processes and cost accounting rules. They can automatically reroute invoices if an approver is unavailable, adapt to changing cost centers and rules, and handle exceptions intelligently.
Once you’ve established approval routing workflows, it’s time to set up payment processing.
Step 7: Set up payment processing
Streamline and automate payment processing to complete your invoice automation setup. You have several options to automate payment processing. You can use your existing payment processing solution, use the payment processing solution embedded in your AP automation platform, or use a third-party solution provider. Let’s walk through the steps.
Integrate with your payment system
(If you’re using your AP platform’s built-in payment system, you can skip this step.)
Integrate your AP automation platform with your ERP or payment processing solution. Test the integration to ensure it’s syncing your invoice and payment data between the two systems.
Connect to your payment providers
Connect your payment processing system to your bank’s payment gateway and other payment providers. Configure the payment solution with your account information and routing details, and ensure the appropriate security measures are in place. Then, test the connection to ensure it’s working correctly.
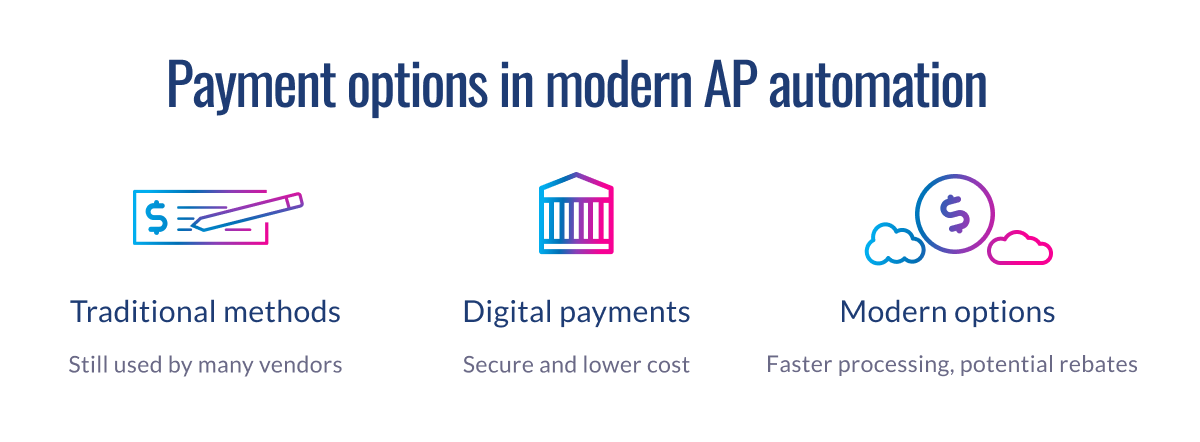
Set up suppliers and choose payment methods
Enter your supplier information (if this information isn’t synced from your AP or ERP system). Choose the payment method (ACH, check, credit card) you’ll use with each supplier and set up their account information.
Schedule and reconcile payments
Set up payment schedules to ensure timely payments to vendors and avoid late fees. Regularly reconcile payments with your bank and credit card statements to ensure accuracy and identify any discrepancies.
After setting up your data entry, coding, matching, approval, and payment workflows, you can begin processing invoices automatically.
Step 8: Measure and improve
Once your invoice processing automation solution is live, regularly monitor and measure KPIs and optimize your processes. Focus on these factors.
Track key metrics
Monitor accounts payable KPIs like invoice processing cycle time, error rates, cost per invoice, invoices processed per full-time equivalent (FTE), and first-time match rates to measure process performance and identify areas for improvement. For example, a high invoice error rate could indicate that your POs are inaccurate or vendors are sending incorrect invoices. By addressing these issues, you can reduce the number of erroneous invoices.
Audit and continuous improvement
AP automation platforms provide a complete audit trail by recording all user actions, transactions, and communications. Use this to your advantage by conducting regular audits to gauge the effectiveness of your internal controls and measure invoice processing accuracy.
Review and update policies
Proactively review your AP policies and processes regularly to ensure they align with evolving business needs, regulatory changes, and technological advancements. Update the processes as needed and record the changes.
Master invoice processing automation with Stampli
Invoice processing automation is the best solution to streamline and optimize your accounts payable processes — and Stampli is the best way to automate accounts payable. We’re the leading AP automation solution and the only one designed for how AP teams actually work. Stampli brings a solid track record of helping companies optimize AP workflows, and an exceptional reputation for customer satisfaction.
“Stampli isn’t just an AP invoice solution; it’s a game-changer with stellar support”
Don’t just take our word for it. Hear how one customer describes how Stampli has transformed their AP workflows.
“What I love about Stampli is its transformative efficiency in invoice processing. Since integrating, our workflow has soared with faster processing, reduced errors, and enhanced transparency for approvers. Our Customer Success Manager and the entire Stampli support team have been outstanding — prompt, collaborative, and attentive, even across time zones. The AI integration aka “Billy,” adds an innovative edge. Stampli isn’t just an AP invoice solution; it’s a game-changer with stellar support.
Stampli has revolutionized our AP team by addressing multiple challenges head-on. Its streamlined invoice processing has notably reduced our processing times, while Billy optimizes tasks and boosts the accuracy of data entered. The user-friendly platform enhances transparency and efficiency for approvers, simplifying the approval process, which is a critical part of our invoice processing.”
With Stampli, you won’t have to automate your invoice processes alone. Our AP experts work alongside your team during implementation and integration and beyond. Contact Stampli today to learn how we can help you transform your accounts payable.